The pickle man

Friday, May 27, 2011

Chocolate Angel Mousse Pie


I don't really have a favorite dessert - it's more like a top five.  And this one definitely makes the list (others include strawberry pie, a peach and blueberry crisp that I promise to post as soon as the peaches are in season, and homemade ice cream - so I guess that's really a top four.  I'll work on finding a fifth.  Found it: pumpkin cheesecake.)


I made this last night because my sister came back from Italy!  And my other sister came in from Greenville, South Carolina... to introduce us to her boyfriend FIANCE!! for the first time.  It's a big weekend down here!


Anyway, this pie is not difficult, but it is time consuming.  It's a labor of love. It is totally worth it.  And it takes a fair number of mixing bowls. 


You start by making a meringue shell


and baking it in a slow oven (300) for an hour until it is lightly browned


While that cools, melt some good semi-sweet chocolate.  And use bars, not chips, because whatever they put in chips to make them stay shaped like chips is not the best for melting into a smooth mousse: 


While the chocolate cools, beat 4 egg yolks on high, until they are pale yellow.  This will take about 5 minutes. 
This was about 1 minute in - the color needs to be much lighter!  


Once the yolks are light(er), pour the (COOLED!) chocolate into the yolks. 

picture courtesy of Dixon, since I was pouring melted chocolate into a machine
OK, here is where the number of things you have to wash gets a little crazy.  
Take the beater and the mixing bowl off of the mixer.  Substitute another mixing bowl and switch to the whisk attachment.  Beat 2 egg whites on high until stiff peaks form. 


With a spatula, scrape the whipped egg whites into the bowl with the chocolate; fold the whites into the chocolate mixture. 
Note: the folding does not have to be perfect.  The goal is to combine the whites and chocolate without breaking all the tiny bubbles that will make your mousse fluffy and light.
In the same bowl that you whipped the whites (no need to wash), whip 1 1/2 cups of heavy cream. 


Fold half of this into the chocolate mixture.  Save the rest to put on the top of the pie. 


Once the mixture is smooth, pour into the meringue shell. 


Optional: mix the remaining whipping cream with 1/2 tsp sugar for a little sweetness. 


Top with the rest of the whipping cream. 


To garnish, use curls of shaved milk chocolate OR (in the event that you do not keep chocolate bars on hand because if you do, you eat them) you can chop up some of these guys: 


And let your favorite 4 year old sprinkle on top: 


Chill, then SERVE!


The condensed recipe: 

Chocolate Angel Mousse Pie

Meringue Shell: 4 egg whites
1/2  tsp cream of tartar
1 c sugar

Chocolate Mousse filling
8 oz semisweet chocolate
4 egg yolks
1 tsp vanilla
2 egg whites
1 1/2 cups heavy cream, whipped
Shaved sweet chocolate

Preheat oven 300 degrees.  Beat egg whites with cream of tartar until firm.  Add sugar, 2 Tbs at a time.  Beet until glossy.  Spread into 10 inch pie plate.  Bake 1 hour.  Cool

Filling: Melt the chocolate in the top of the double boiler over simmering water.  Let cool. Beat yolks until thick (this takes a really long time - 5 minutes on high speed with a powerful stand mixer.  You want them to turn a pale yellow color).  
Add the vanilla and the melted chocolate. 

In a separate bowl,  beat egg whites until firm.  Fold into the chocolate mixture.  Wipe out the bowl you used for the egg whites (no need to wash) and beat the cream until it's firm.  Take approximately half of the whipped cream and fold it into the chocolate mixture (the rest you will use for the top). Now pour/ spoon the chocolate mousse into the meringue shell.  

Spread remaining whipped cream over the top.  Chill until about 30 minutes before you want to serve it.  Sprinkle with shaved chocolate.

Tuesday, May 24, 2011

First Fruits

Summer is almost here!  2 more days of work, and then lots of days to play with the boys!  In the meantime, I apologize again for the lack of blogging material.  I've still been cooking, but it's mostly been old standbys that I've already posted, or failures that aren't worthy :)

But tonight, we are celebrating the first fruit of the garden (well, technically a vegetable, but you get the idea).

Yep, we grew that! From a little tiny seed!
And, to be completely honest, this is really the second fruit.  We had an Ichiban eggplant last Thursday, but I forgot to photograph it.

Anyway, tonight for supper, I sliced this guy up
tossed it with some salt and olive oil (Kosher and extra virgin, if you like specifics)

and then threw him on the grill...

with some drumsticks...
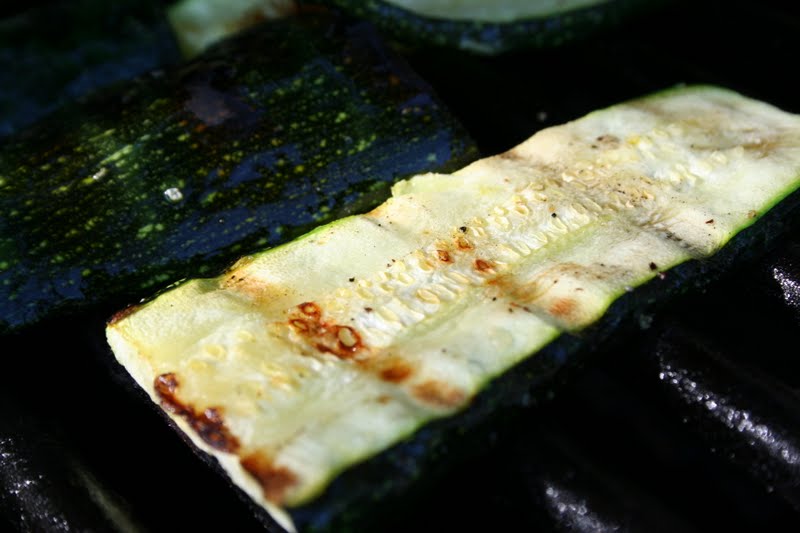
 I like to grill both of these on the lowest setting for 15 minutes or so (well, obviously longer for the chicken, but the zucchini is the star here!)...

 Until they get all caramelized and have pretty brown stripes...

And meanwhile, the kids played in the backyard.


"TOO BRIGHT!  I need your hat, Mommy!!"

Thanks, much better.  But I'm still going to make this silly face, because, well, it's what I do. 

Friday, May 13, 2011

A Mint Julep

I always hesitate to post about mixing drinks... First, I'm definitely not an expert.  And then I have friends who don't drink (but read the blog) but every once in a while, I feel the need to share.

This drink is something that needs to be shared.

It's not a classic mint julep - largely because I don't have a mortar and pestle to appropriately muddle the mint. And stopping to muddle mint every time I want to have this does not make sense.

So instead, I make a mint tea of sorts...

(And by the way, when people tell you to plant your mint in a container or else it will take over the garden... you should heed their sage advice... pun intended, since my sage was the most recent
victim of the mint invasion.  So if you need mint, please ask!)

And please, please don't forget the garnish.  It's not just for appearance (although I love the way it looks) but it puts the fresh mint right under your nose when you take that first sip...

4 cups water
several handfuls of mint leaves (about 1 cup, loosely packed)
1 cup sugar
Bourbon to taste
More mint to garnish

Combine the water, mint leaves, and sugar in a large microwaveable container.  Microwave on high for 4-5 minutes, stirring occasionally.  Chill.  This will keep in the refrigerator indefinitely :)
When you are ready to make a julep, fill a glass with crushed ice.  Pour in 1-2 ounces of bourbon.  Pour the mint syrup in.  Mix well (you can also do this in a shaker).  Garnish and serve!

For a twist, you can add lime juice and replace the bourbon with rum.  Pour a splash of soda on the top, and voila, a mojito!

Oh, and for the non-drinkers out there, Dixon LOVES the tea - just over crushed ice with a garnish :) It's a little sweet, so I usually add a little water to his.

Tuesday, May 10, 2011

Winner, Winner, Chicken Dinner (Roasted Chicken with Sweet Potatoes)

So, school is almost out for summer.  The garden is growing. There are many many blogs in my future.  But for now, survival mode continues... The AP examining of my students is very stressful!

But tonight, I get to eat this for dinner:
Hello, gorgeous!

I learned to make this chicken because one of my mom's best friends brought it to me after I had Dixon.  It's almost worth going in to labor, it's that good.  So now, I bring it to my friends when they have babies!  Lots of garlic, but I haven't really received many complaints :)

It's amazing.  I think my son would have me make this every other night.

The chicken is also very easy.  It takes about 15 minutes to prep it, then it bakes merrily away for an hour to an hour and a half.  Then it comes out - one dish, super simple cleanup.

And it is delicious - not dried out at all.  Crispy skin, juicy cooked meat... sigh.

Some secrets/ tips to the perfect roast chicken:
1. Buy a small, young chicken (3-4 lbs).  I go organic, cage free, but that's up to you.  Just know that if you buy one that's too big, parts of it will overcook and parts will still be disgustingly pink and jiggly when you are finished cooking it.  Small = good.

2. Don't bother with knotting the legs together.  If you want a yummy, crispy skin, "spread eagle" is the way to go.

3. If you want the skin crispy, wash the chicken and pat it dry.  Really dry.  Use a kitchen towel - not just a wad of paper towels.

So, that's about it.

Here's the recipe:
1 3-4 lb young chicken or hen
1 clove garlic, split horizontally
1 lemon, quartered
3-4 springs fresh rosemary
2 sweet potatoes, cubed
1 yellow onion, sliced in thin(ish) rings)
1 16 oz package frozen green beans (these were sadly missing tonight, and they are my favorite part, but the grocery store was out.  Sigh).
Salt, pepper, and poultry seasoning (thyme, sage, etc) to taste
1 tbs butter

Preheat the oven to 425.

Cube sweet potatoes, slice the onions, and scatter the potatoes and the onion in the bottom of a roaster big enough to hold the chicken.
Wash the chicken, pat dry, remove giblets.
In a small mixing bowl or prep bowl, create a paste of softened butter (OK to microwave) salt, pepper, and seasonings.  Rub this paste under the skin.  Try not to tear the skin (I did, and it was still OK, but do try!)
Stuff the cavity with the garlic, lemon, and rosemary.  If everything doesn't fit, pull out the lemon - it stands up to the heat the best - and scatter it around the dish.

Plop the chicken (very unceremoniously) on top of the sweet potatoes

Bake at 425 for about an hour (total time) - use a meat thermometer!  The legs should read around 170, and the breast around 160 when it is finished.
After the first 45 minutes or so, add the green beans (pretend I did this - they are really yummy and you should not leave them out).  Finish baking for another 15-30 minutes.

While it is baking, do whatever you like - you don't need to check on it.  Do some laundry, go running, or take the time to give some extra snuggles to a cute little boy who is trying to cut 4 molars all at once.

Enjoy!

Saturday, April 30, 2011

Crawfish Quiche

Springtime in Louisiana means crawfish boils.  Lots of crawfish boils.

We had one for my baby's first birthday!


And who would have guessed - he LOVES crawfish.
is that for me?

because it looks... yummy! 

so good! 

And chocolate cake - but that's a story for another day :)


But after the party is over, I inevitably have a few leftover crawfish tails - not to mention potatoes, corn, mushrooms, onions, and all those other yummy things we throw in the crawfish pot.  Not really enough for an etouffee or anything fancy, but I love crawfish enough that it seems a small crime to throw even a handful away.
so....
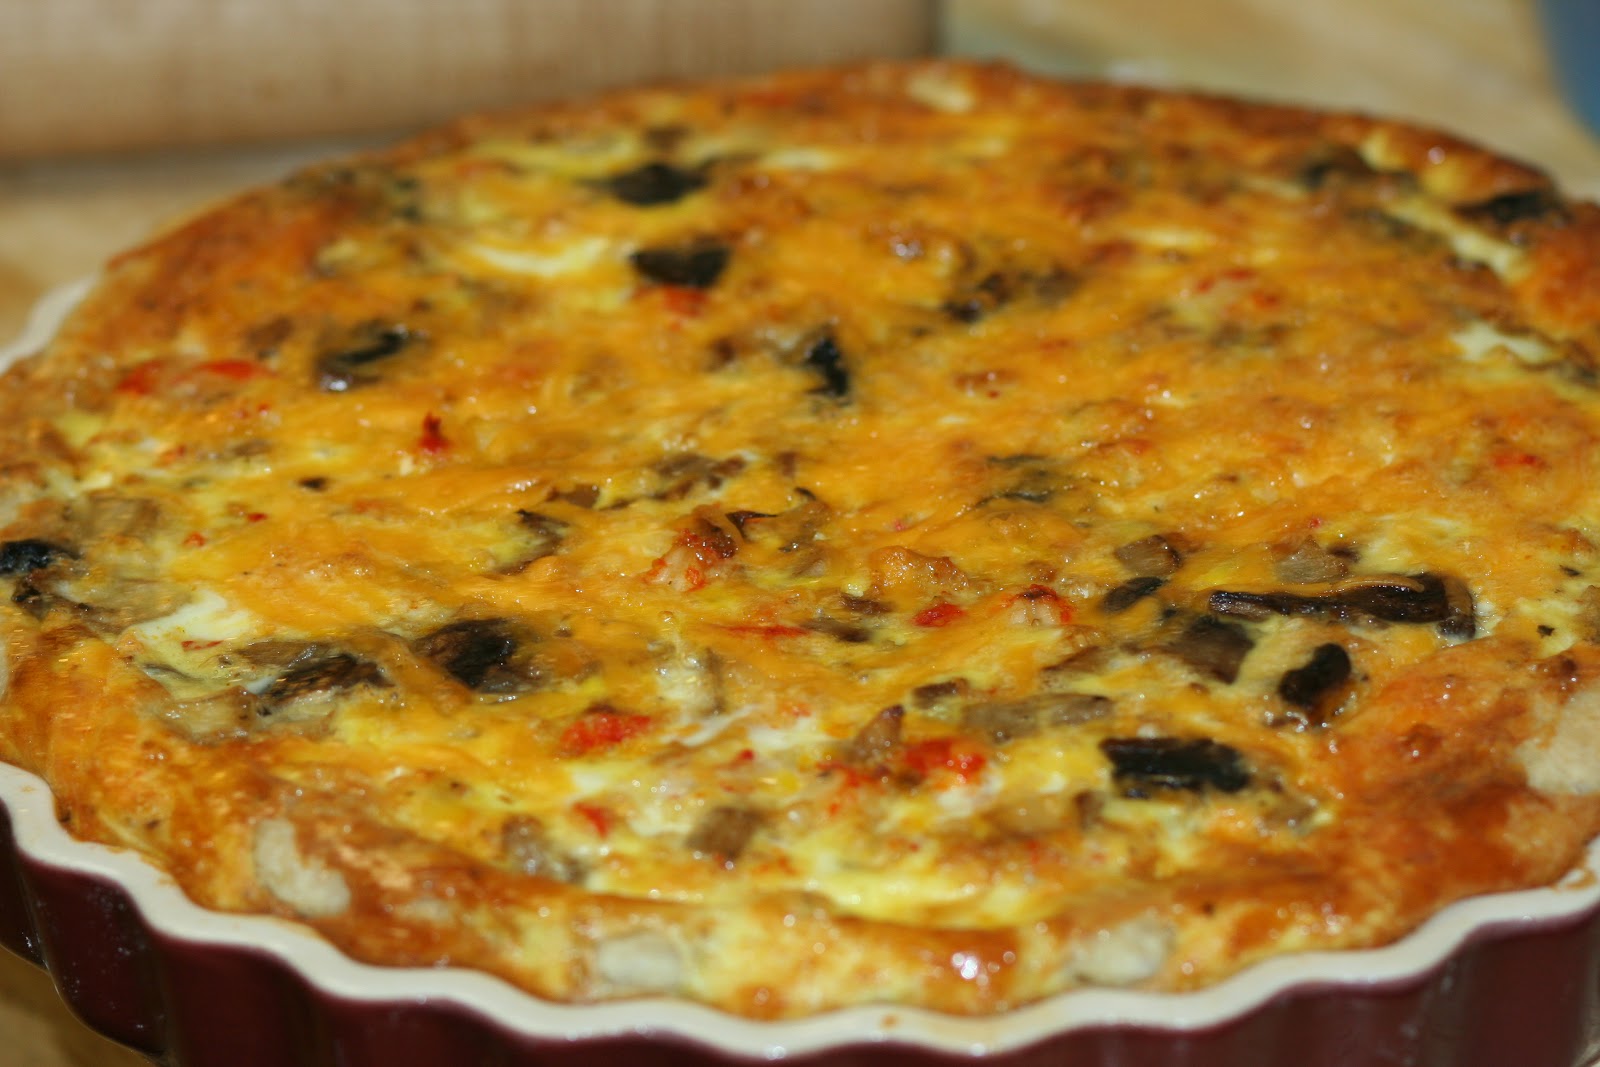
Crawfish quiche.

I know I have posted before about my love for leftovers re-incarnated as quiche, but this recipe takes it to the next level... something about the corn and potatoes in there, or maybe it's just that I really like spicy eggs...

First, chop up all the leftovers from your crawfish boil.  I had mushrooms, onion, garlic, corn, and 2 red potatoes.
Loosely chop your tails and grate a lot of cheese.

Then, roll out a pie crust and start adding ingredients.

Pour in the egg mixture and top with more cheese.  Bake until the eggs are set (about 45 minutes).
Then serve!


Recipe:
1 pie crust
assorted leftovers from crawfish boil
1/2 lb crawfish tails
1-2 small red potatoes, skin on, diced
3-4 mushrooms, diced
1/2 boiled onion, diced
3-4 boiled cloves garlic
1/2 cup corn, removed from cob
8 - 10 oz sharp cheddar cheese, grated
6 extra large eggs (or 7 large)
1 cup milk
salt and pepper to taste (I did not use much because the crawfish boil is very salty and gave the eggs an amazing flavor!)

Roll out the pie crust.  Fill with the leftovers from the crawfish boil.  In a separate bowl, mix eggs and milk.  Pour this mixture over the leftovers.  Top with cheese.  Bake at 350 for 45 minutes, or until the eggs are set.

Enjoy!

Sunday, April 10, 2011

Very Southern Banana Bread


This afternoon, my husband told me he wanted a snack.  And I've taken a rather long break from the kitchen, so I decided to make banana bread.  
I looked at quite a few recipes - Paula Deen likes buttermilk, Pioneer Woman prefers sour cream, but I finally decided to adapt one from Smitten Kitchen... largely because it contained bourbon.  And I've never baked with bourbon, but wanted to try it out. 


It was delicious. 


Also, this turned into one of those recipes were I didn't quite have all the ingredients, but I liked my adaptations so much I included them below for you. Generous, right?  But for the original, just go here. 


I got my butter melted and my bananas mashed and then went for the brown sugar - and realized I only had about 1/3 a cup.  And the recipe called for 1 cup.  I had white sugar, but I didn't want to miss the molasses-ey taste of the brown... and then I spotted THIS: 


And I'm so very glad I did. 


So Steen's, plus pecans, plus bourbon.  This was quite a banana bread. 


3-4 very ripe bananas, smashed
1 stick butter, melted
2/3 cup white sugar
1/3 cup light brown sugar
1 egg, beaten
1 teaspoon vanilla
1 tablespoon bourbon
2 tablespoons Steen's cane syrup
1 teaspoon baking soda
Pinch of salt
1 teaspoon cinnamon
1/2 teaspoon nutmeg
1 1/2 cup of flour
1/2 cup pecans, chopped and toasted (optional, and I guess you could use walnuts, but then it wouldn't be as Southern)


Preheat the oven to 350°F. 
Mash the bananas (with a fork, potato masher, or let your 4 year old improvise) in a large mixing bowl.  Add the melted butter.  Add the rest of the ingredients, except the flour and nuts.  Stir well.  Fold in the flour and nuts, trying not to over stir.  Pour into a buttered (or Baker's Joy-ed, if you're me) 4X8 inch loaf pan or 2 mini loaf mans (or muffin cups, or I'm sure there are other adaptations).  Bake for 45 minutes (if mini-loaf pans) - shorter for muffins, longer for a big loaf pan - until a tester (or toothpick) comes out clean.  

Cool on a rack (but just a little) and serve - possibly with more butter. 

One of the reasons we've been a little busy: 
My sister had a baby!  I'm an aunt (again, but still!!). 
I volunteered to keep all the boys last Saturday: 

Thomas - 1 week
Witt - almost 2
William - just turned 1
and Dixon - 4 1/2.  

It was fun! And exhausting. 
Luckily I had good help :)