The pickle man

Sunday, January 3, 2016

Sunday Stew


Happy New Year!  I've purchased a domain name and "resolved" to update at least weekly.  This recipe is one I've wanted to share for a long time because it is one of our household staples.  It counts as comfort food but is reasonably easy on the wallet and the waistline -- great for the first week of January.  It's the perfect thing to make on a Sunday afternoon.

Once you chop everything up, it simmers deliciously on the stove for hours, requiring minimal stirring.  It freezes well and makes enough to share.  It can be served over egg noodles, grits, or rice, or, since it uses turnips and carrots instead of potatoes, it doesn't feel redundant over mashed potatoes (our favorite).  As an added bonus, everyone in my family devours it and goes for seconds.

The original recipe is from Pioneer Woman.  I've changed the proportions to better suit our family, and made it a little thicker.

Sunday Stew

3 Tbs olive oil
1 Tbs butter (salted and unsalted both work)
2  1/2  pounds beef stew meat (I buy chuck roast and cut it up), salted and peppered
1 onion, diced
1 tablespoon or 3 cloves minced garlic
6 oz (1 small can) tomato paste
6 cups (32 oz) beef stock (I use Kitchen Basics Unsalted)
1 Tbs Worcestershire Sauce
5 carrots, peeled and cut into pieces
2 large turnips, peeled and cut into 1 inch pieces *
1 Tbs softened butter combined with 1-2 Tbs flour to make a thick paste **
Salt and pepper to taste


Add the olive oil and the butter to a heavy pot or Dutch oven.  Turn the heat on high.  When the butter foams,  add the half meat in a single layer.  Don't overcrowd the meat, or it won't brown as well.  Cook for 1-2 minutes, until brown.  Turn once and cook for another minute.  Remove with a slotted spoon and cook the other half of the meat.  Remove to a plate.

Reduce the heat to medium and add the diced onions, stirring well and scraping up any delicious browned bits.  Cook until slightly caramelized, about 8-10 minutes.  Add the garlic and cook for another 1-2 minutes.  Add the tomato paste, stirring well.  Add the beef stock in a slow stream, stirring constantly.  Add the Worcestershire.  Bring to a boil.  Reduce the heat to low, add the beef back to the pot, and cover.  Cook for 2 hours, stirring occasionally.

After approximately 2 hours, add the carrots and turnips and cook uncovered for 30 minutes.

In a small bowl, combine softened butter and flour with a fork.  Whisk, in pieces, into the stew.  Cook for an additional 5 minutes to thicken.

Serve over mashed potatoes (or grits, noodles, or rice).  And for dessert... as for me, I'll be trying to help my family's resolutions along by removing the temptation of the Christmas chocolate.


* Promise me you'll try the turnips.  I never had one until I was over 30.  Along with Brussels sprouts, turnips are one of those things my mother never cooked (she's more of an asparagus/ zucchini person).
But when Pioneer Woman went on and on about the turnip-y turnips, I felt that I would be doing the stew a disservice if I didn't give them a try.
Plus, William randomly loves turnips.  (You can blame the Box Car children books).  The best bit?  Serving this to my mom and asking her to guess the vegetable.  She loved it, but the closest she could come was "white squash?"


**  This is called a beurre manie.  It's one of my favorite techniques for thickening something at the end of the cooking process.  You can soften the butter in the microwave, but I tend to melt it, which doesn't work.  So instead, I put the tablespoon of butter in a small bowl on the counter at the beginning of making the stew.  After 2 hours, it is soft enough to mash with a fork.
Pioneer Woman doesn't thicken hers at all, so you can skip this step.  Or, you can make a slurry out of one tablespoon corn starch and one tablespoon cold water, and add that to the pot to thicken it.  However, to me, the beurre manie adds the most flavor. 

Enjoy!

Thursday, February 13, 2014

Linzer Cookies

Linzer Cookies

I "heart" my Valentines!


Three snow days happened to coincide with Valentine's Day this year.  

My front yard looked like a sheet of ice, so we did what any good Louisiana family would.  We dressed the kids in their warmest clothes (all of which are designed for hunting and are therefore camouflaged). 
Then my husband pulled out this black thing that he uses to pull his duck decoys through the mud during duck season.  Apparently, it has an official name: duck decoy sled.  

Even though the children are hardly decoys, it made for an amazing morning flying down the ice-covered levee.


When we got tired of being cold and wet, the kids piled in front of a movie and I decided to bake... because honestly, why would I disturb the laundry, sitting there so peacefully?

I've been eyeing various renditions of these Linzer cookies for a week or so.  Ultimately, I decided on Ina Garten's, primarily because (unlike true Linzers), they don't have any nuts in them. 

I couldn't decide what to fill them with, so we tested out Nutela and seedless raspberry preserves.  Dixon strongly preferred the raspberry-filled, plus they looked more festive.  But my friend Lisa persuaded me to try one with both Nutella and raspberry, and to me, those were the best!

"Linzer" cookies (adapted, barely from The Barefoot Contessa Cookbook)


Ingredients:
3/4 pound unsalted butter at room temperature
1 cup granulated sugar
1 teaspoon pure vanilla extract
3 1/2 cups all-purpose flour
1/4 tsp salt

Raspberry preserves or Nutella to fill
Powdered sugar for dusting

To make the cookies:
In the bowl of an electric mixer, combine the soft butter and sugar, mixing until well-combined.  Add the salt and vanilla, beating well.  Add the flour.  Beat on low until the dough starts to come together - this will take a little over a minute.  The mixture will appear grainy at first, and then will start to form larger lumps.  Scoop out approximately 1/3 of the dough and place it on a rectangle of plastic wrap.  Using the wrap, shape the dough into a flat disk.  Repeat two more times until you have 3 separate flat disks.  Chill these for 30 minutes or more.

When you remove the dough from the fridge, roll it out to 1/4 an inch thick on a well-floured surface.  You will need two cookie cutters, one large and one small (of course for Valentine's Day, I used hearts.  I'm nerdy like that).  Cut approximately 20 heart shapes using the larger cutter.  Then with half of the hearts, go back and cut out a smaller middle heart.   Carefully transfer the shapes onto a parchment paper lined baking sheet.

You may also bake the little hearts that you cut out, but I recommend doing them on a separate baking sheet, since they cook MUCH faster. 

Bake at 350 for 15-20 minutes (depending on how thin you rolled the hearts).  The baking time for the smaller cookies was closer to 10 minutes.

Allow the cookies to cool to room temperature. 

Dust the top sections with powdered sugar (I use an old flour sifter for this, but a sieve also works great). 

Spread the bottoms with Nutella, raspberry preserves, or a mixture of both. 

Carefully place the top section on the bottom section. 

These will keep for 2-3 days.  If you're making them in advance, the unbaked dough will last up to a week in the fridge.

Wednesday, October 16, 2013

Pumpkin Cake with Maple Cream Cheese Frosting


The weather finally cooled off a bit.
And my husband is building me the fireplace I've dreamed about for 10 years.
And my dad volunteered to play with the boys for the afternoon.
And grades are due tomorrow, and I'm procrastinating.
And it's fall, y'all!
But no, no promises to start back up blogging :)

This cake is amazing.  My kids' current "most-favoritest" babysitter actually said it might be better than Dixon cake (what they call my mom's chocolate cake).

You should try it.  Today, if possible.

Ingredients:
For the cake:
1 cup plus 3 tablespoons sugar
1/2 cup vegetable oil
2 eggs
1 14 oz can pumpkin puree (not pie filling)
1 teaspoon vanilla extract
2 tablespoons sour cream
1 2/3 cup all purpose flour
1 teaspoon baking soda
1 teaspoon ground cinnamon
1/2 teaspoon nutmeg
1/2 teaspoon ginger
1/2 teaspoon salt
2/3 cup chopped pecans or walnuts (optional)
For the icing:
4 oz cream cheese
1 teaspoon vanilla
1 teaspoon real maple syrup
2 1/2 cups powdered sugar
1 teaspoon milk (*as needed)

Preheat the oven to 350.
Oil and flour (or Baker's Joy) a loaf pan, a bundt pan, 3 mini loaf pans, or muffin cups.
In the bowl of a stand mixer, combine the sugar, oil, and eggs, beating well.  Add the pumpkin puree, vanilla, and sour cream, beating until well combined.  In a separate bowl, stir the dry ingredients (flour, soda, spices, salt) with a fork.  Add to the wet ingredients.  Beat until just combined.  Add nuts, if using.
Bake for 45 minutes - 1 hour if using the large loaf pan or the bundt pan.  If using mini loaf pans or muffin cups, the time will be closer to 25-30 minutes.  Test to make sure the middle is set.

Allow the cake to cool.  Meanwhile, make the icing.

Melt the cream cheese in a microwaveable bowl.  Add the other ingredients, stirring vigorously.  While the icing is warm, pour it over the cooled cake.

Happy Halloween!


Monday, December 31, 2012

Turkey Pot Pie


Was it cold where you live today?

Today it was cold enough this monkey wore his hat while playing on the monkey bars.


In Louisiana, it was perfect weather for pot pies and footie pajamas from Santa.  And we have left-over turkey in our fridge... here's betting you might, too.


And let me apologize in advance for the cell phone pics.  You see, we are still living at my parents' house.  Here's to a 2013 that brings a new kitchen (and new house!) into my life.  But no more excuses for not blogging.  This pot pie DEMANDS to be shared.


It comes together in less than 30 minutes and bakes in another 30.  And if you tell your picky 6-year-old that the top is made from croissants, he will eat it all.  Your 2 year old won't need trickery... or at least, mine didn't.

This recipe is loosely adapted from my brand-new, much-loved Smitten Kitchen cookbook (my mother-in-law got me an autographed copy, because she is definitely the best mother-in-law in the universe, for many reasons other than this).  Basically, I am really looking forward to making Deb's version, with white beans and pancetta, but I had left-over turkey.  And I had frozen puff pastry.  So I adapted.

Ingredients:
2 carrots, diced
1 small onion (or 1/2 of a large one) diced
1 rib celery, diced
1 tsp minced garlic
1 Tbs olive oil
3 Tbs butter
3 Tbs all purpose flour
2 cups chicken stock (I used homemade because I had it, but I would definitely substitute with Kitchen Basics and be just as happy).
2 cups (more or less) chopped leftover turkey (white or dark meat, or a mixture)
1 sheet frozen puff pastry (I used Pepperidge farm), defrosted.
1 egg white

Remove the puff pastry from the freezer and allow to warm enough that you can work with it (about 15 minutes on the countertop).

Preheat the oven to 375.

Dice the vegetables and saute them in the olive oil in a heavy pan over medium high heat for 8-10 minutes.  Season with salt and pepper and stir frequently.

Remove the vegetables and scrape out the pan (no need to wash).  In the same pan, melt the butter and add the flour, stirring until there is a little color (2-3 minutes).  Slowly whisk in the broth.  Cook over high heat, stirring frequently, until slightly reduced to a gravy-like consistency.

Meanwhile, roll out the puff pastry (but not too thin).  This will be the lid for your pot pie.  You can use a rectangle to cover a standard baking dish, or cut individual circles if you are making individual pies.  The lid should be slightly larger than the baking dish you are using.

Add the vegetables and meat to the gravy on the stove and stir to combine.  Pour the mixture into the baking dish.  Brush egg wash around the sides of the dish so that the lid will stick.  Press the lid onto the top of the dish.  Cut vent holes in the lid with a sharp knife (my kids like for me to carve their initials).  Brush with egg wash and bake at 375 for 35 - 40 minutes, until the crust is browned.

Sunday, December 2, 2012

Christmas Sugar Cookies


 It's December 2 and my kids are wearing sandals and shorts with their Christmas shirts... but we can still dream of snow and make sugar cookies!


So, here are the cookies:
First, make the dough.

4 sticks (1 pound) butter at room temperature
2 cups sugar
3 eggs
4 cups all purpose flour
2 tsp baking powder
1/4 tsp salt (may need a pinch more if using unsalted butter)
1 Tablespoon vanilla

Cream the butter and sugar until smooth (2-3 minutes).  Add eggs, mixing well after each, and vanilla.  Add flour, baking powder, and salt, mixing just until combined.

Wrap in plastic wrap and chill at least 3 hours, or overnight.

Sprinkle your work surface with flour and powdered sugar, generously. Only work with a portion of the dough at a time; leave the remainder in the refrigerator to stay cold.  Roll out the dough to 1/4 inch.  Cut cookies.

Bake on parchment paper at 375 until slightly brown around the edges.   These cookies contain baking powder, so they will spread slightly.  If you want extra-sharp edges, use a recipe without any leavening, such as shortbread.

Mine got a little too brown... I was looking at tile for the master bath...
While the cookies are cooling, prepare the Royal Icing.  Sound fancy? It's remarkably easy.

2 egg whites
3 1/2 cups powdered sugar
1 tsp lemon juice
Food coloring

Beat the egg whites until stiff but not dry.  Add the powdered sugar, 1 cup at a time, beating well after each addition.  Add the lemon juice.  If you want more than one color, separate the icing into bowls and dye each bowl a different color.  You can add water to thin the icing, but be very cautious -- a few drops go a long way!

Place the icing into a piping bag (or a ziploc bag) with a tip inserted into the end (put in the tip before you put in the icing!).  I like a star tip with my kids -- you can't do as fine of a detail, but it is much more forgiving for little hands.

Once the cookies have cooled, pipe on decorative designs.  You can also add sprinkles while the icing is still soft.  The icing will dry hard (it's the same kind I use on gingerbread houses), so the cookies travel extremely well.  I sent some with both my kids to school last Friday.

Monday, February 13, 2012

Banana Caramel Pie... what I made for my Valentines

So, tomorrow is Valentine's Day. 

Apparently for the under ten set, this holiday is right up there with Thanksgiving...  not as important as Halloween or Christmas, but it definitely ranks.

For my son's class tomorrow, I was supposed to bring fruit.  For him, this meant only RED fruit (or possibly pink), so he convinced me to purchase all sorts of out-of-season produce: strawberries, grapes, cherries, pears, apples, and plums.  I probably accumulated more "food miles" than in the previous 6 months put together, but our fruit salad is RED.

And then for my husband, I finally tried out banana caramel pie.  One of my friends calls this "Danger Pie" because of the potential for exploding cans of milk.  Either way, it was a very easy day-before-Valentine's dessert. 

1 baked pie shell (I cheated for once and used store-bought, but if you want to make your own... you know, if you are not moving out in 5 days to prepare for massive home renovations... I recommend this one).
3 bananas, sliced thin
1 can Eagle sweetened condensed milk, made into caramel (see below)
1/2 cup whipping cream
2 Tablespoons sugar
1/2 Heath Bar, crushed

The time-consuming part is making the caramel, so I did that last Sunday while the baby napped.  Basically, you take the wrapper off of a can of sweetened condensed milk, then put it in a pot of boiling water.  Boil it for 3 hours, adding water as needed to keep the can completely covered. Apparently, the "danger" part of the "danger pie" comes if you let too much water evaporate... putting the milk can in danger of explosion.  If your can does not explode, shake it when you take it out (with hot pads) and make sure it no longer sounds like milk.  Then, allow to cool.  This will keep on the shelf indefinitely.

When you are ready to make the pie, slice the banana into the pre-baked crust.  Pour the caramel over the top (you may need to warm it in the microwave if it won't pour).  Whip the whipping cream and the sugar until soft peaks form (or heck, since everything else on this one is out of a can or box, just go ahead and break out the Reddi Whip).  Top with the Heath bar and get your kids to pose!


And yes, we still wear our Santa pajamas in February.  Don't judge.

Sunday, November 20, 2011

Pecan Pie

It's that time of year again!  Pecans are falling off of trees all over the place!  (and it's almost Thanksgiving, but that seems secondary to pecan season right now)

This is my favorite version of pecan pie.  The recipe comes from the Cotton Country Collection - the local Junior League's first cookbook, published in 1972.

And yes, my grandmother's famous "Pea Goo" also appears.  I'll save that recipe for later in the week.

Anyway, it's duck season, too, so I was entertaining the boys by myself this morning.  And we made pie!

And since it's also Thanksgiving season, be expecting to see a lot of related posts this week :)  In the meantime, here are some old favorites that are Thanksgiving-worthy:
Pumpkin cheesecake
Macaroni and cheese
Roasted brussel sprouts
and French bread

and coming soon, my FAVORITE Thanksgiving side - Spinach Madeline

But back to the pie.  I don't actually bring this anywhere for Thanksgiving (my husband's sister is in charge of pecan pie and you don't mess with tradition!)... but my husband was begging for one a little early. 

Start out with an unbaked pie crust.  If you want to make your own, I highly recommend this one by Smitten Kitchen.

Just be forewarned, if you let your 5 year old roll out the dough, it may not be as even as you would like.  However, since my pie crusts are rarely things of beauty anyway, it's nice to have an excuse!


And he definitely had fun!


As for the filling, it's pretty basic.  Eggs, sugar, Karo light corn syrup (to which my son said, "I thought you said corn syrup is bad for me"... sigh).

And some flavorings - a little lemon juice, salt, and vanilla.  And a splash of bourbon, if you're so inclined.

Then 1 cup of roughly chopped pecans...

AND (and this is what truly sets this pecan pie apart)  browned butter.

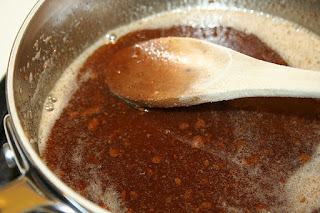
Basically, you take a stick of butter and heat it in a saucepan until it smells nutty and brown and delicious.  Then let it cool and pour it in with the rest of the pie filling.

Pour the filling into your pie crust and bake!

Here's the recipe:

Ingredients:
1 stick butter, browned
1 cup sugar
1 cup Karo light corn syrup
3 large eggs, beaten
1 tsp vanilla
1 Tablespoon bourbon (optional)
1/2 tsp lemon juice
1/4 tsp salt
1 cup chopped pecans
1 unbaked pie shell

In a saucepan, brown the butter.  In a separate bowl, add the ingredients in the order listed. Blend in the browned butter.  Pour into the unbaked pie shell.  Bake at 425 for 10 minutes, then lower the oven temperature to 325 and bake for another 40 minutes.  Let cool.

Delicious with ice cream, whipped cream, coffee... and turkey!