Sunday, January 30, 2011

White Bean Chicken Chili

This is one of my favorite things to have in the freezer... and perfect to cook on a rainy Sunday.

I started out with a Paula Deen recipe (available here). But I've made a few changes along the way.

First, I always, always double this recipe.  For marginal extra effort, I get enough to put in 3 quart bags in the freezer.  Plus, my sister is having a baby soon, so I'm stockpiling for her.

Second, I use Great White Northern beans instead of Navy Beans.  Great Whites are a little creamier - not so starchy.

Also, I soak my beans overnight.


After the beans have soaked, I put them in a large pot, with about 10 cups of chicken stock.  I freeze quart bags of homemade stock when I boil chickens for gumbo and other things, but if you don't have any, canned is fine.  I also love the boxed broth because you don't have to use all of it at once.

I turn the heat on medium under the beans and stock, and while that heats up, I melt some butter in a separate skillet and dice two or three onions.


In a separate saucepan from the beans, I melt 1 stick of butter.
THEN I chop up the onion.  I use 2 medium yellow onions.
If you have a super tiny kitchen with absolute no counter space, I highly recommend a cool chopping block that covers part of the sink.  My husband (who benefits most directly when I cook) gave me this one last year.  Love. 
Alright, just for the novice cooks out there, I'm going to demonstrate the easiest way to chop an onion.  Seriously, this will make this recipe a lot easier.  Or you can just use your food processor, but I can chop onions like this in less time than it takes me to clean the food processor. 

Start by lopping the very top off the onion.  But leave the hairy root end ON!


Next, chop the onion in half, down the prime meridian - NOT the equator!

Peel one half (again, leaving the root intact), and place it cut side down. 

Make vertical slices into the onion, like this. 

Don't cut all the way to the root.  It will hold all the pieces together for you. 

Then, simply turn the onion and chop the other way.  Makes a perfect dice :)

If you are trying to get every last bit out of your onion, turn it again so the root is pointing up toward you, and chop a bit more. 

OK, now you have a nice, lovely pile of chopped onion. 

Saute the onion in the butter until it is soft.  This takes about 10 minutes.

Then add the garlic (I use the stuff out of the jar) and 3 cans diced green chiles.

Saute another 5 minutes (while dicing chicken - see below). 


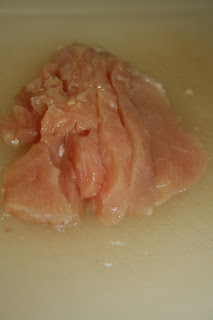
While the stuff in the pan is smelling more and more amazing, I chop up the chicken breasts.  This works best of the chicken is slightly frozen, so I'll stick it in the freezer on the cutting board, or, if I'm using frozen chicken, I won't let it defrost all the way.

Dicing chicken is really not fun.  This is not a recipe for people who get freaked out by raw chicken.  You want the chicken pieces to be about the same size as the beans.  And make sure your baby is really really down for the nap before you do this.

First, trim your breasts of the fat, gristle, and other not-so-appetizing bits.

Then, slice it into, well, slices.

  Then dice those.

Put them in a bowl and dump the following seasonings on top:
2 Tablespoons ground cumin, 2 Tablespoons dried oregano, 2 tsp black pepper, 1 tsp ground cayenne or red pepper, 1 large pinch red pepper flakes.  The original recipe calls for white pepper instead of red, but I don't really like the flavor as much, and I rarely have it on hand.


Hopefully by now, your beans and stock are boiling.

Put everything in the pot with the beans - chicken, onion mixture, spices

It won't look pretty, but that's OK.


Now the easy part - let everything cook for 2-3 hours, stirring occasionally and adding salt toward the end, if you need to.  It will depend on how salty your chicken broth is.
Then serve it in your favorite Mexican bowls :)
I inherited these from my grandmother.


This will thicken upon standing... and thicken even more upon freezing. 


It's great served with cornbread (see New Year's Day post for the corn bread recipe).

Oh, and I always freeze at least half of this in two or three 1 quart Ziploc bags.  If you don't overfill the bags, they will freeze flat for easy storage.  I reheat a bag on a weeknight by putting it in the sink and running hot water over it until it is soft enough to be squeezed out of the bag and into a microwaveable bowl. Sometimes I have to add water if it's too thick.  It's ready in about 15 minutes, which is less time than it takes me to do takeout with 2 kids :)

Condensed Recipe - this is the doubled recipe.  To serve six, half it. 

  • 2 pounds dried Great White Northern beans
  • 12 cups chicken stock (homemade if you have it)
  • 1 stick butter
  • 2 medium yellow onions, chopped
  • 2 tablespoons minced garlic 
  •  3 cans green chiles
  • 2 pounds boneless, skinless chicken breasts, finely chopped
  • 2 tablespoons ground cumin
  • 2 tablespoons dried oregano
  • 2 teaspoons ground black pepper
  • 1 tsp ground red pepper
  • Pinch red pepper flakes 
  • Fresh cilantro for garnish, if desired.

Directions

Rinse beans well, cover with cool water, and soak overnight. Drain. Put the beans in large pot with 10 cups of chicken stock and bring to a boil over high heat.

In a saucepan, heat the butter over medium heat. Add the onion and cook until soft, about 10 minutes.  Add the garlic and chiles and saute for 5 minutes. Add chile mixture to pot with beans. Add the chicken, cumin, oregano, pepper, red pepper, and red pepper flakes. Lower the heat to medium and cook, stirring occasionally, for approximately 2 hours, adding more stock as necessary. Serve with cornbread, if desired.

Friday, January 28, 2011

Baking for my students... Cinnamon Breakfast Bread

Early in my teaching career, I figured out that kids are highly motivated by food.  Especially homemade food.  They'll do anything - even their homework.  If every student in a class does all of their homework 5 times in a row, I bake for them.  And last night, I made cinnamon breakfast bread.

I love this stuff.  My friend Allison really really loves this stuff.  I remember making it with her in a crappy dorm kitchen at William and Mary, and it was still pretty amazing.

So here's how it goes.

Cream 2 sticks of butter and 2 1/2 cups sugar with a mixer (and yes, I remember doing this with a hand held mixer.  I do not miss that thing).
sorry for the weird picture - don't know why my mixer looks like that... Ah, digital photography.  But it's still better than the handheld mixer. 

Add 4 eggs, one at a time.  For baking, I use extra large eggs because they make things fluffier.  And I like fluffiness.  In baked goods, at least.

Mix in 1-2 tsp vanilla and 1/2 tsp salt.

Measure 1 cup buttermilk.  Add 1/2 tsp baking soda to the buttermilk (no need to stir).  Alternately add 3 cups of flour with the buttermilk.. as in, put in some flour, then pour in some buttermilk.  End on the buttermilk (no idea why - it's just what my mom always did!)

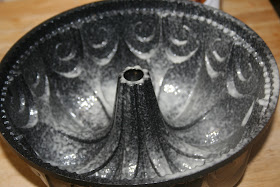
Grease and flour a bundt pan or tube pan, or 2 loaf pans.


 And I never really "grease and flour" any more, because my mother-in-law introduced me to this stuff.


It's amazing.  It lets me use pretty fleur de lis bundt pans without nasty stickiness.  Scroll down and look at the finished cake.

She knows all the best tricks.  Seriously. (And in a side note, she bought me colored sugar at a specialty bakery store when she went to the big city!  So my next King Cake will not look like a Halloween freak show!!  I'll probably try this weekend... Also forthcoming - white bean chili). 

But back to the cinnamon breakfast bread.  In a small bowl, mix 2 tablespoons cinnamon and 2 tablespoons sugar.
Pour 1/2 the dough mixture in the bundt pan.

Sprinkle 1/2 the cinnamon mixture on top.

Add the rest of the dough.

And the rest of the cinnamon mixture.

Swirl with a butter knife (Allison was always much more artistic at swirling).


Bake the bread for 1 hour in a 350 oven, until a toothpick inserted in the middle comes out clean.

Let it cool in the pan, then invert it over a plate.
Ahh!! Thank you , Baker's Joy.  Another triumph.


This is awesome when warm, and very yummy the next day.  You can spread butter over the top and toast it, too.  It makes your whole house smell wonderful.

The cinnamon swirl is supposed to be slightly prettier than this, but as noted before, I let my friend do the swirling, and she lives in Massachusetts now.  So it was more like a tunnel-of-cinnamon cake, but you get the idea.

I also love nuts in this recipe... but for the kiddos, I decided to do without.  If you do use nuts, I recommend pecans, and definitely toast them before adding them.  I use about 1 cup.

Nuts aside, teenagers will do their homework for this.  Even if the homework is poetry.  So you know it's good!

Condensed recipe:
2 sticks butter
2 1/2 cups sugar
4 eggs
2 tsp vanilla
1/2 tsp salt
3 cups flour
1/2 tsp baking soda
1 cup buttermilk
1 cup toasted pecans (optional)
2 Tablespoons sugar and 2 Tablespoons cinnamon mixed in a separate bowl.

Cream the butter and the sugar.  Add eggs one at a time.  Add vanilla and salt.  Add the soda to the buttermilk (no need to stir).  Alternately add the flour and the buttermilk mixture, mixing until just combined.  Pour half into a greased loaf pan, top with half the cinnamon mixture, then the rest of the dough and the rest of the cinnamon.  Swirl.  Bake at 350 for an hour, or until a toothpick inserted in the middle comes out clean.

Sunday, January 23, 2011

Michael's Favorite cookies - Peanut Butter

My husband loves peanut butter cookies.  It's always seemed an odd "favorite cookie" choice, what with all the chocolate chips and oatmeal raisins in the world.


I used to think it had something to do with the fact that my brother (notorious for eating all of whatever Michael was planning to snack on) HATES peanut butter. 

Whatever the reason, these are my go-to recipe for when I need a favor... or to get out of trouble.  As in, "Sorry the house is still a wreck, because I blogged during nap time, but I made you these!!"


You start by creaming the butter, white sugar, and brown sugar. 


 Add the peanut butter (I like crunchy because I like the little pieces of nuts in the cookies, but we never have it on hand).  Then add the eggs. For baking, I use extra large. 

My older son operates the Kitchen Aid with scary proficiency.
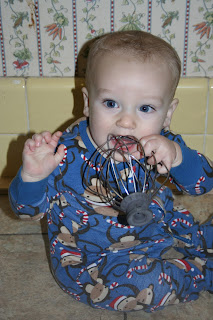
My big boy didn't want the baby to feel left out, so he generously gave him the whisk attachment to chew on. 


Then you add the flour, salt, baking soda, and baking powder (getting the right ratio of these two is what gives you the perfect cookie.  Soda = crunchier; powder = more cake-like/ chewier)

Refrigerate the dough for 10 - 15 minutes to make it easier to work with.  Shape it into 1 inch balls, using either your hand or this handy melon/ ice cream scooper. 

This is the child who does NOT like greasy hands. 

Flatten the balls with a fork.
The stone keeps the bottoms from burning

While my son flattened the cookies, I wrapped up the rest of the dough in some plastic wrap and stuck it in the fridge.  Homemade slice-n-bake, for later in the week. 


Bake at 350 for 10 minutes, until warm and delicious! 

I usually double this recipe and stick the extra in my fridge. 


1/2 cup butter
1/2 cup sugar
6 tbs brown sugar
1/2 cup + 2 tablespoons peanut butter (crunchy)
1 egg
1 1/4 cups all purpose flour
1/2 tsp baking powder
3/4 tsp baking soda
1/4 tsp salt

Cream butter, sugars, and peanut butter.  Add beaten egg and mix well.  Sift and stir in flour, baking powder, baking soda, and salt.  Chill the dough for 15 minutes.  Roll into 1 inch balls.  Place 3 inches apart on greased baking sheet or ungreased baking stone.  Flatten criss-cross fashion with a fork.  Bake in a 375 oven for 12-15 minutes.  Cool for a few minutes on baking sheets before removing to a cooling rack. 

Saturday, January 22, 2011

Lemon Meringue Pie

I'm southern.  And I love to cook.  But I'm a bit of an anomaly because I really don't like to cook with condensed stuff that comes out of a can.  On any given day, you are far more likely to find real mushrooms and real whipping cream in my fridge than you are to find cream of mushroom soup in my pantry (p.s., you can usually substitute some combination of the former for the latter).

I know, I'm weird.  My own mother (if she's reading) is definitely rolling her eyes by now.  She's probably blaming this on the fact that I went to Virginia for undergrad - which, in her mind, is not a Southern state.  Capital of the Confederacy?  Pshaw.

But there are a few recipes for which I am willing to make an exception to my "start from scratch" rule.  Lemon Meringue Pie is one of them.  Don't worry, there is no cream of mushroom soup in it - just sweetened, condensed milk.  And as of yet, I haven't tried to condense my own milk.

Reasons I made this pie:
- It was my uncle's birthday.  And he's pretty amazing.  So amazing I named my son after him.  This definitely merits pie.
 - It's delicious, and ready in under 20 minutes.
- Dixon loves to make lemon meringue pie.  It's in the Amelia Bedelia books.  I think he associates pies with getting out of trouble after making a big mess.
Doesn't this look like a kid who needs to know how to get out of trouble?

He loves meringue.

Oh, and it's my grandmother's recipe :)

So, first you line a pie plate with 'Nilla wafers. It's OK if you have to break some of them to make them fit.


Then you separate 3 eggs.  Put the yolks in one bowl and put the whites in the bowl of your mixer.
Put the juice of 2 lemons in with the egg yolks. (If you're even more into canned stuff, you can use 2 Tablespoons of bottled lemon juice.  That's the only way my mom made this pie).  Add a can of sweetened condensed milk.  Stir.  Pour this on top of the 'Nilla wafers.
My son said, "Look, all the little moons got covered up."

Meanwhile, start your mixer.  Whip the egg whites.  Add 5 Tablespoons of sugar.  Beat until peaks form. Then put that on top of the rest.
Then he said, "Now the moons are getting their fluffy covers.  It must be winter."  I know, he's adorable. 
Finally, bake in a 350 oven for 8-10 minutes, until the meringue is slightly brown on top.

Chill before serving... if you can wait.  I never can.  As a result, when I serve, it looks like this:
my piece

or this
my husband's piece

But my family loves me anyway.  Even if I can't serve pie. 

the baby clapped for me :)  He claps for everyone, but it still makes me feel special. 

Condensed Recipe
1 can sweetened condensed milk
Juice of 2 lemons (* or 2 Tablespoons of bottled lemon juice)
3 eggs, separated
18- 20 Nilla wafers
5 Tablespoons sugar

Preheat the oven to 350.  Line a pie plate with Nilla wafers.  In a bowl, stir together the egg yolks, condensed milk, and lemon juice. Pour this mixture over the wafers.  Beat the egg whites using an electric mixer.  Add the sugar.  Put this on top of the pie.  Bake at 350 for 8-10 minutes, until lightly browned. 

Tuesday, January 18, 2011

You say potato... I say sweet potato

Sweet potatoes are big here.  They are also cheap. And they are in season.  Which means that certain members of my family are in danger of turning a little orange from all of the sweet potatoes. 


He really likes them.

So, all you need is a few sweet potatoes (I used two), some olive oil, some kosher salt, and some black pepper.

Oh, and a cookie sheet or half sheet pan.

Preheat the oven to 450 (one way to find out whether or not it is clean!). Leave the skin on the potatoes, and cut them into 1 inch cubes (or thereabouts... this is NOT something where I try to be a perfectionist, making it notably rare.  Other areas where I don't suffer from perfectionism: laundry and vacuuming).

But back to the potatoes. Spread them on a cookie sheet.
cute little boy hands - he's such a great helper!


Pour a tablespoon of olive oil, a few pinches of kosher salt, and a few grinds of black pepper, and toss them around.  I had to do this myself, since my helper does NOT like greasy hands.  Unless there is cookie dough involved, in which case, he will endure.

Bake at 450 for 10-15 minutes, stirring occasionally with a spatula.

They come out all brown and lovely.

And then, enjoy!!

Can you see the family resemblence?

These were intensely popular.

P.S. Work is really crazy this week.  I'm trying to make teenagers like poetry.  So far, as they would say, "Epic fail."  I have to work on this.  So, sorry this wasn't much of a post.  But I do highly recommend the sweet potatoes.

P.P.S.  When I went to go get the camera card to upload photos, my husband told me (seemingly in passing), "You know, you don't need roosters to get eggs.  Just to get chicks.  But the hens will lay even without a rooster."  I'm a little scared.